Tennis Themed 60th Birthday

Over the holiday break I was super busy helping family out with two major occasions.  The first one being my father-in-law’s 60th birthday.  He is a tennis nut and after much research my mother-in-law and I concluded there isn’t much out there for tennis decorations.  We put our brains together (which can sometimes lead to trouble in a good way of course) and came up with some great ways to incorporate his favorite past time.

One thing my mother-in-law knew she wanted to include was fun facts from 1953 the year he was born.  She scoured the internet coming up with the most fun and timely facts and then I designed these table tents to include them.

Tennis Theme Tent Cards 6x6 with watermarkTennis Theme Tent Card inside 6x6 green with watermark

You will see that I placed the question on the front and then on the inside I just included a brief part of the question and answer.  I used a great free font download that was what I thought super sporty.  Its called Branboll and you can find the download here

Next up was centerpieces for the tables.  Like I said there isn’t much out there for decorations to purchase so we made our own.  My MIL found these vases at Garden Ridge Pottery.  I then filled them with my FIL leftover tennis balls (he didn’t even notice they were missing)  I then used my new Silhouette to cut everything out.  One-by-one I glued each layer to the next using some fine nose crafting tweezers and a Zig Two way glue pen.

Tennis Ball Theme Birthday Centerpiece Tennis Theme Centerpiece Tennis Racket

I used crinkle paper to fill the vase on the right and stuck the dowel in.  For the centerpieces on the left I had a hard time getting the dowels to stand straight up so we sliced a line in the tennis ball with an exacto knife and then put the dowel inside and it was the perfect fix!

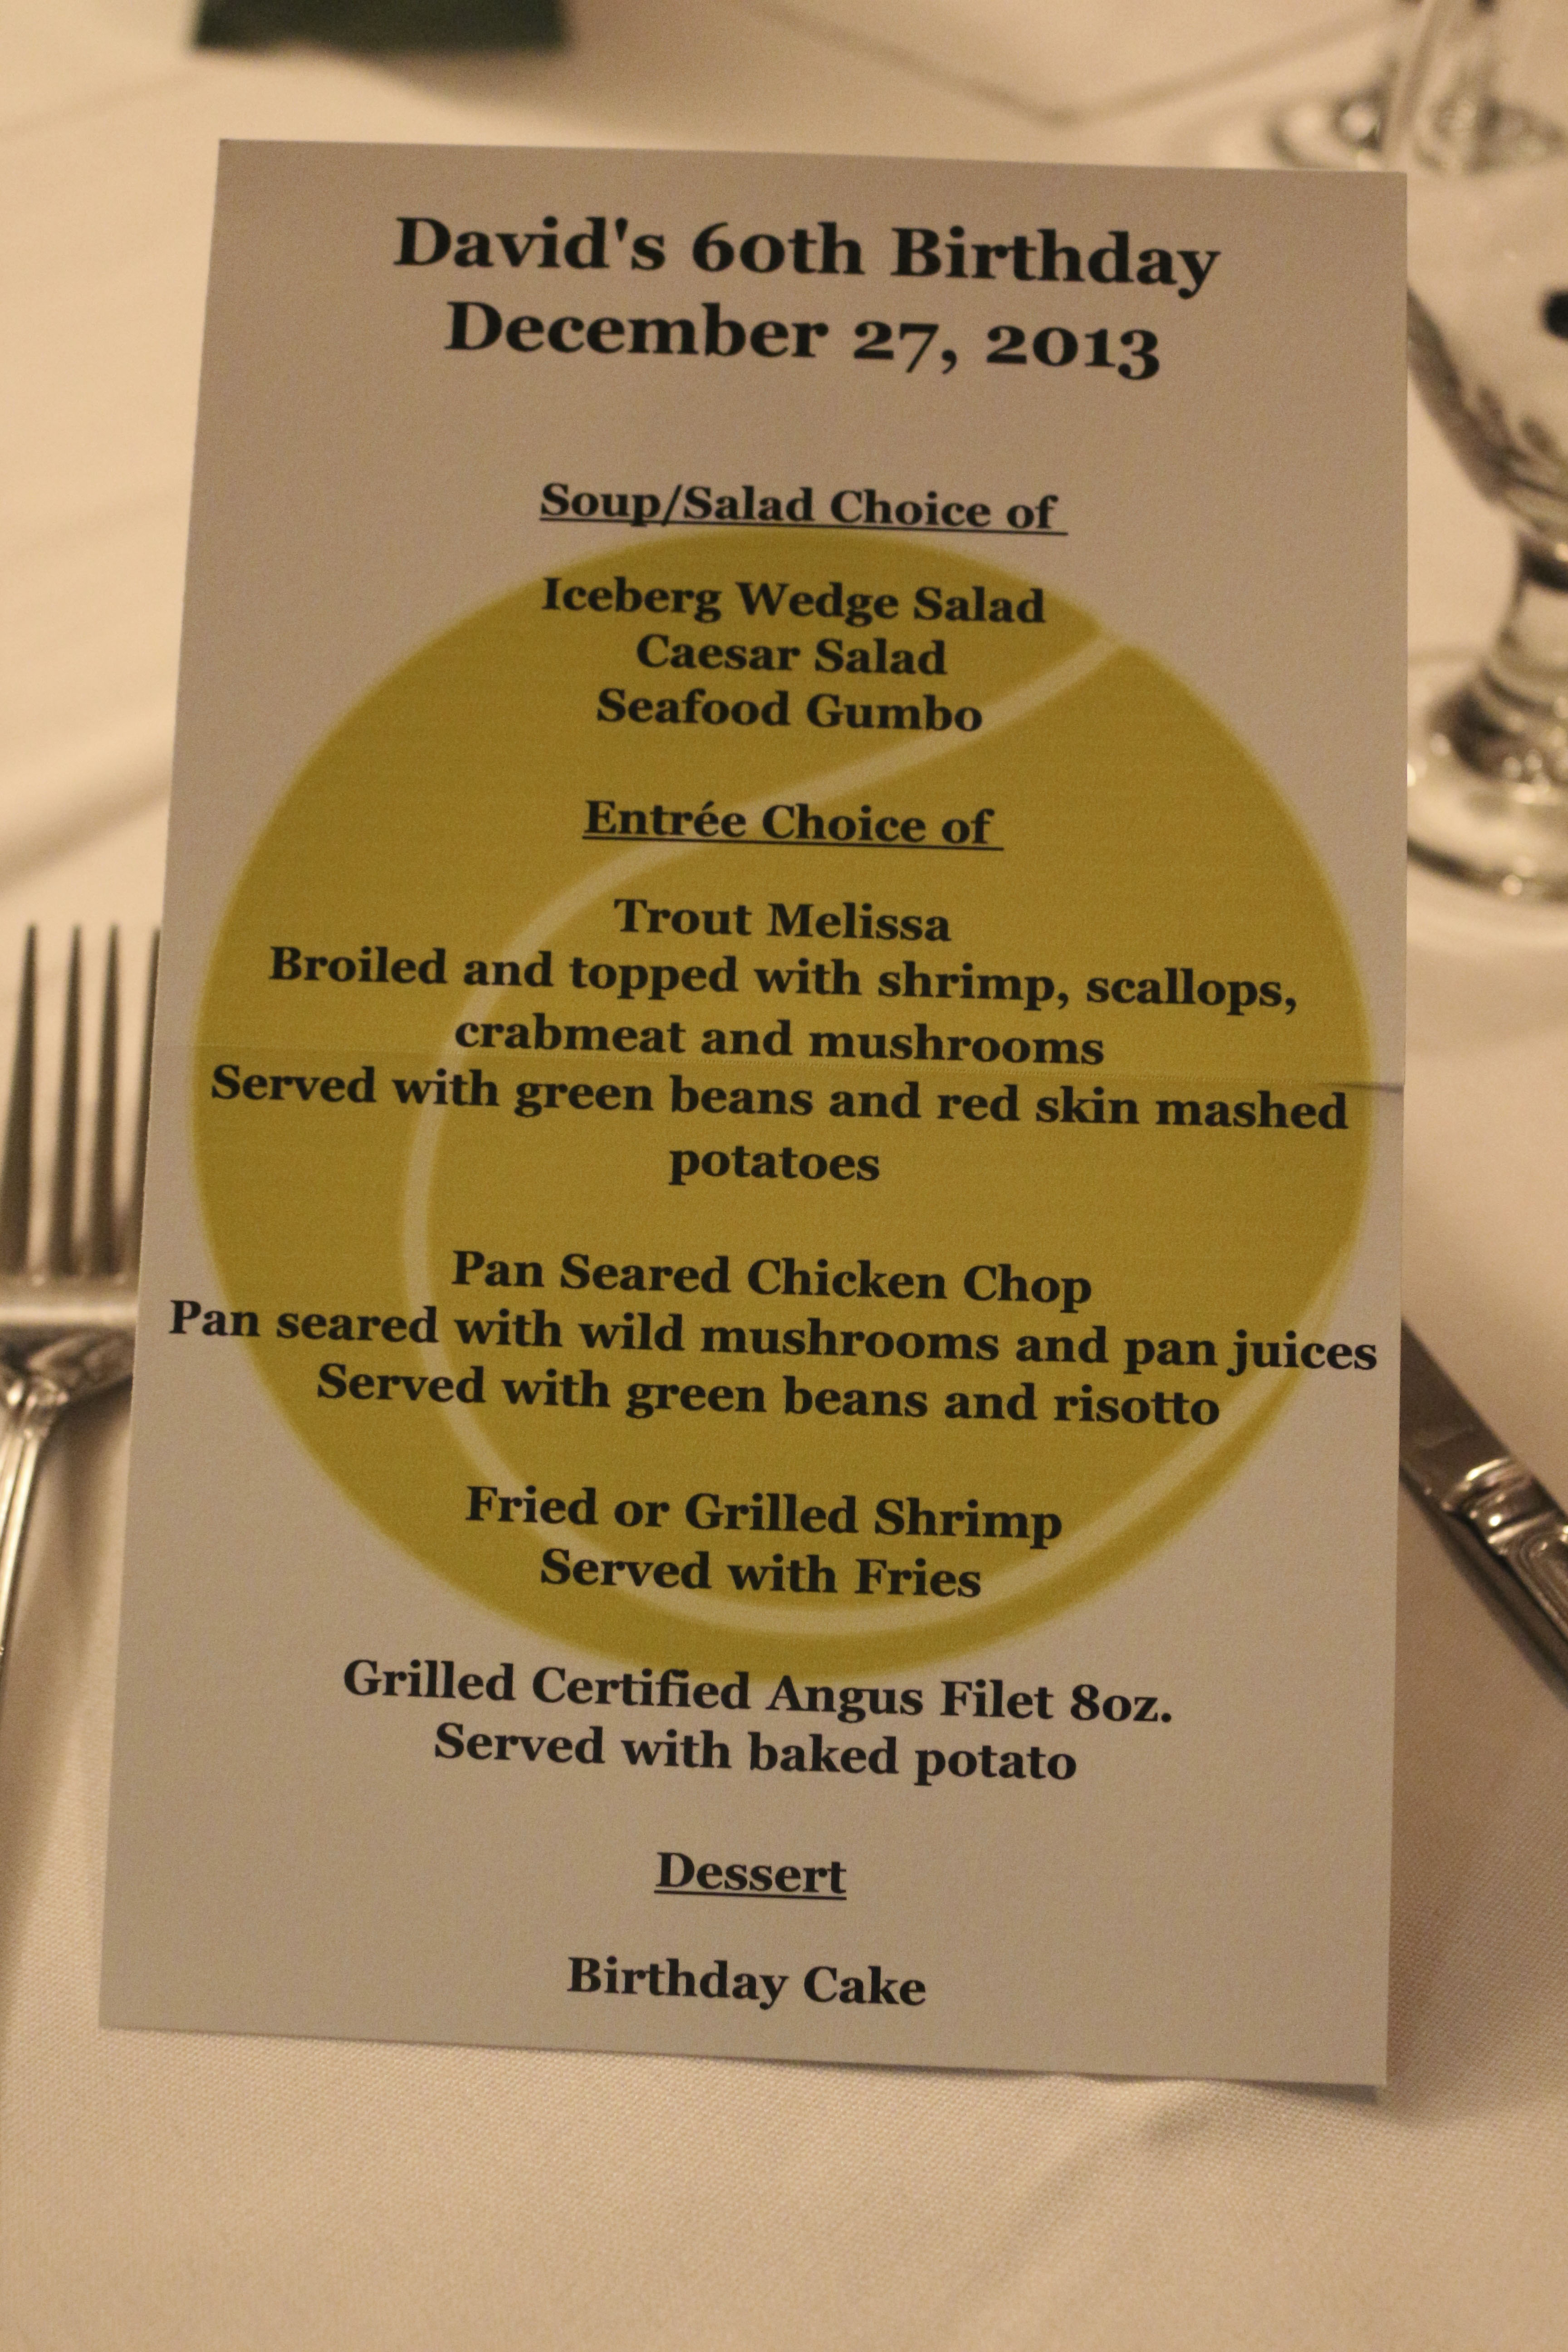
Another great addition to the tables was the tennis themed menu card.  This was all my MIL and she printed them out at home super simple project that adds to the theme and helped the guests.

Tennis Theme Party Menu

What birthday party would be complete without a banner.  So I took to the Silhouette again and used another sporty free font download Graduate (if I can find the link I will update)

Tennis Happy Birthday Banner

To celebrate my FIL’s 60 years we created a photo collage for him.  You may have seen this idea on Pinterest – as a photo enthusiast I love it and think it turned out great.  I just took two pieces of foam core and drew free hand the 6 on one sheet and 0 on the other.  I then used my exacto knife again to cut them out.  Make sure you have a fresh blade and either a thick piece of card board or cutting mat underneath.  I then touched up the numbers with cuts based on what appealed to my eye.

60 birthday photo collage

I printed way more photos than I needed to because I wasn’t sure what would end up working.  My suggestion is just make sure you have a good balance of horizontal and vertical especially with a number like 6.  The two orientations of photos really help give you variety to pull from.

For those that read my blog regularly you know my MIL and SIL have their own cake baking/decorating business.  They whipped up this cute feature cake with my FIL on top.

Tennis Theme 60th Birthday Cake

Last but not least both my MIL and I loved this idea for favors which again if you are on Pinterest at all I am sure you have seen.  But we had fun customizing this just for my FIL.

Getting Old Sucks Lollipop bin

Each lollipop had a tennis ball tag that says “Getting Old Sucks” and on the flip side “Happy 60th Birthday David”  you can find those favor tags in my Etsy shop along with some other cute tennis themed things!

The party was a great success and we wish my FIL aka Papa a very Happy 60th Birthday year!

Happy Birthday David Family Photo

Party Post: Camp David

For many of my returning readers you know that I often help friends & family out with their parties in various capacities.  My good friends the Dluhy’s had me help design their son’s amazing 2nd birthday with the theme of Camp David.

For this party I helped with various components.  Let’s start with the signage…

These were originally created for David’s 1st birthday.  To make them I took two pieces of foam core, covered them in a faux wood paper (the large kind found to make bulletin board backdrops) then covered those in protective clear shelf liner (aka contact paper)  I took color coordinated duct tape and attached them to one another.
For the lettering I used a variety of colors that fit in with the theme, used the Life’s a beach cricut cartridge and then just stuck them on with some double sided tape.

Another area I worked on with the “camp site” aka “base camp.”  Originally this party was supposed to be outdoors, but Mother Nature did not cooperate.  We moved the party inside and turned out working great.

To create the A-Frame wood tent I used this tutorial I found on pinterest.  I headed to Joann’s to find the right fabric for the tent and found a great lightweight fabric that had the appearance of canvas (what I had envisioned as a traditional camp tent)

For the blankets we found at Joann’s large run felt.  I believe it was a 72″ wide run if I remember correctly.  I bought 2 yards of each color (Brown, Orange and Green) and then cut them in half to double our amount.  This was a great cost savings (instead of buying real blankets) and also totally helped keep the mess of the kids off the floor.  The white boxes you see are lunch boxes for each child.  The labels I created using the original artwork from the invitation and my cricut Accent Essentials cartridge.

Even though the kids had their own lunch boxes there was still a food buffet for the adults or the kids who needed something different.  We used some leftover burlap (also from David’s first birthday) to add a layer on top of the orange table cloths.  Then I took some extra burlap and maybe a yard of green gingham fabric to create the garland we pinned in the center of the display.

These favors are great – not only to the come contained in a super cute mason jar (which are all the rage right now) but they are all the ingredients you need to make smores at home!  What better thing to take home?  I created the labels on top of the jar, again from the original artwork of the invite plus adding a super cute camp themed font to read Camp David.
Instead of doing cake or cupcakes, the Dluhy’s chose to make these super yummy brownie smores.  They were premade brownie bites that they then topped with a marshmallow and melted them down to “toast” them.  The little leaf decorations came from the party store and the wood stumps (courtesy of my mother-in-laws tree she had to chop down) all added to the rustic look/theme of the party.

Now for the star of the party, the faux campfire.  This was a collaborative effort between the Dluhy’s and I.  They wanted the fire to be as real as it could, while remaining safe.  To create the look first cut strips of red and yellow cellophane.  Then I layered in red and orange tissue paper.  In the center of the “fire” I placed a battery operated fan (to blow the flames) and a battery operated light (to make the cellophane light up)  We placed firewood around the the setup of tissue and cellophane.  We used some leaves (found at Michaels) around to just enhance the scope of the fire.  It was a big win with the birthday boy.

As always this party was so much fun to work on and not only did the guests have a great time but the birthday boy really enjoyed himself too.

Happy 2nd Birthday David! Thanks for letting me get to share in your special day!

Isabel’s 2nd Birthday Party – Rainbow Art Party

Hey Everyone welcome back – it has been a super busy few weeks around the Kariel household and a whole 2 weeks since I last had a blog post up.  Thankfully all good things have kept me from a new post and mostly Isabel’s 2nd Birthday… a rainbow art party.
I have to tell you originally I had an Under the Sea theme planned for this party but I am so glad I went ahead and changed it.  Isabel is just in love with painting and play doh right now so it suited her to a tee!  I also have to admit as a creativity addict, this party was so much fun to work on and source things for.  It was really hard to cut things down to avoid going overboard.
First things first – my inspiration… Pinterest of course!  Check out my awesome Isabel Art party inspiration board for more ideas.  I used a combination of ideas to create her birthday invitation.  I made them all by hand and I just bought primary color 8.5″x11″ paper at Michaels (used my 40% off coupon too) then had to purchase the purple separately but still pretty affordable.    I cut the primary color paper in half.  I created the layout in photoshop and duplicated it to fit two on a page.  Then just printed at home onto white card stock.  The chevron was a free printable that I used to get the pattern and then I created my own custom colors in photoshop and stretched it to the chevron I liked best.

The fonts are also a combo of free fonts I have downloaded over the past several months.  I used Scribblebox and you can find those on my pinterest board Project Life/Free Downloads.

Then onto the sourcing… Sourcing you ask? That just means I scour the internet and various party stores, craft stores and other random stores to find what I want to use for the party.

For the over all effect of the room I wanted it to be super colorful, especially because the room we were using was so white.  It was so easy to accomplish by using round plastic tablecloths found at Party City and hanging the aprons on the chairs (found them at Amazon)
On the windows I made paint chip garland thanks to the wonderful paint samples of Behr paint and Home Depot.  I think I was the most excited about this because when my sisters and I were little we would use the paint chips to make collages from them so to tie them into Isabel’s party was kinda special.  I did one strand of simple circles sewn together on my Brother sewing machine.  Then the other strand you see was made from two circles cut out and sewn back to back.  I then folded the sides to make them look 3-D.
Behind the paint chip garland were rainbow colored zig zag garland which was created by using this awesome tutorial from Jordan over at Oh Happy Day – Super easy and nice effect!
Each table had it’s own art project ranging from crayons & stickers to roller paint or play dough.  On each table there were the various materials needed for the activity.  The centerpiece boxes were recycled from a previous party and just covered with wrapping paper from Hobby Lobby.  Also, there were hand wipes labeled as “artist wipes” and an easel with an artistic quote.  The mini easels were created from craft sticks and just hot glued together after being painted.
I made homemade finger paint and play dough and they were such a big hit with the parents – especially those that have kids who put everything in their mouth.
The fans were made from party decorations from Party City.  I added a custom cricut cut out and the cricut cut #2.  They were mounted to wooden dowels and tied with simple grosgrain ribbon. 
The main stations of the party were “Creative Juices” for the beverages, the “Art Gallery” which was a drying table for the various projects and the main table which was filled with the food.

These colorful hurricane glasses were re-purposed from a previous party as well.  To tie them into the theme a bit more I used a custom logo and but attached them with a rubber band – super easy!
The food included various rainbow colored foods – a fruit platter, a veggie platter, jello jigglers, rice krispy paint brushes, cake batter bark, chocolate dipped pretzels and a custom cake made by Not Your Everyday Cake

All the banners were created using my cricut.  The fabric backdrop is from Hobby Lobby and I sewed the two colors together once I cut them down to size.  The fabric garland on each side was created from several remnants I had kicking around the house and a few I purchased.
One last great idea that I have used on previous parties is pop up trash cans… Have you seen them?  You can find them at Party City for about $4 and they come in all sorts of colors (I chose colorful polka dots) and they also offer recycling pop up containers also great for a party.

So another year and my baby girl is 2!  This year was so fun to see her interact with the art projects and her friends.  Last year she wouldn’t leave my side, wouldn’t take pictures, talk with her friends or even open presents…such a drastic difference but such a welcomed one!

Party Planning: David’s First Birthday

Back in August a dear friend of mine asked me to help her with her son David’s first birthday party.  She wanted to be my first official client and I jumped at the offer to work with her because not only do I love her but I knew we would work really well together.  The theme of David’s birthday was a barnyard bash of sorts based off the petting zoo and pony rides that were going to be at the party.  
Read on to see more pictures and how we made this amazing party happen!

Lets start off with the overall look of the day.  Red, blue, burlap, gingham and bandanas were the accent colors, patterns and textures we used to tie the decor together. 
Centerpieces on the kids tables consisted of Mason Jars, a strip of Burlap, a torn strip of red and off white gingham (both found at Joann’s) and Sunflowers.  The combination of the yellow, red and brown really were set off nicely by the bandana pattern linens.
Each child got their own boxed lunch that my friend put together herself.  For lunch we served the kids mac and cheese, a turkey roll-up sandwich and a pouch of those super convenient organic applesauces.  I took the barn logo I made for David and increased the size via photoshop to print out and then cut into circles.  I then used my cricut to cut out the scalloped circle to place behind the white logo circle.  Again, just another great way to tie the theme and color scheme into the details of the event.  They also got to take home their own bandanas and cowboy hats that she found via Oriental Trading.  
For the food display I made this burlap runner, the photo banner, cupcake toppers and the santizer wipe labels.  The photos were layered with solid yellow paper then either red or blue gingham topped with the photo of the birthday boy.  I used a blue grosgrain ribbon I had in my stash to weave through the hole punches I made in order to hang it up. 
The cupcake toppers are variations on the logos I made layered on top of gingham paper found at Hobby Lobby and then I stuck a toothpick in between and used double sided tape to piece it all together.
For the santizer cans I measured out the size I wanted wrapped the gingham around the can, secured with double sided tape (I hate tape seams!) then I placed a logo on the front and wrapped contact paper around it.  I knew with messy hands I didn’t want the cans to get messed up by some moisture and the contact paper did the trick.
Here is another shot where you can see the runner, banner and decor of the “adult” food table.  Notice again how we tied in the bandanas, burlap and added another favorite component of mine, galvanized pails!
Now onto the beverage table… Again you will see the repeat elements of bandana, red, galvanized and here we added the ever popular “milk” glasses aka frappacino glasses.  These beverage dispensers are the same one’s I used at Isabel’s birthday party back in February.  They were around $20 at Garden Ridge Pottery and have totally earned their keep.  For the frappacino glasses I am lucky enough to have a friend (shout out Amy) who saves her old ones for me so I don’t have to use my calories saving up these great party glasses.

Here is how we wrapped the juice boxes.  I added some gingham paper and then a logo in the coordinating color.  Love how these came out!

For the mini-water bottles I used another logo to tie in more yellow and red and I think they look great. I wrapped a solid color around the bottle then used double sided tape to stick the logo on.

Onto the Frappacino glasses – here I used my Xyron to put adhesive on the back of the logos to get them to stick onto the glass because they were so big.  While it worked really well at the time – they were a super pain to take off so I won’t be doing that again!

For the straws I searched Houston high and low for the red/white stripped paper straws and found no retail store that offers that color combo – If someone out there reading knows of a place – PLEASE let me know!  I improvised and made gingham flags with the leftover scraps I had from other projects and again wrapped them around the straw and stuck them with double sided tape.
                                                   
Another great project I worked on with my cricut was this birthday banner for the little guy’s high chair.  Not only did it look great but the animals are just so super cute I mean how can you not love that little cow.  I used the Create a Critter cartridge for the animals and then for all signs I used the Storybook font.  Take a look at all the great activities David’s mom had planned out…

Farmer’s Market where you could plant seeds and pay for them on your way out

For all the signs I made them out of Foam board and then wrapped them in a wood backdrop you can get from any teacher supply store – I found this at Michaels actually.  Then I wrapped the board in contact paper to make it a bit more sturdy.  Taped the two boards together with red duct tape and then added the letters I cut out on the cricut with double sided tape.

Happy Birthday David!  It was so much fun working with your mom on your special day!

Do you live in Houston?  Need help with a birthday party?  Let me know and maybe I can help!

Party Planning: Isabel’s First Birthday

I was so excited to plan Isabel’s first birthday party!  I knew immediately that I wanted the theme to be ladybugs… but red and black seemed too regular, I thought of one of my favorite color combos, pink and green.  So with that decided I began scouting the stores.  Hobby Lobby, Michaels, Jo-ann’s, Dollar Stores, Target no store was left unturned in my crazy mission to find just the right components for her special day.

it always starts with a list (the obsessive crafter is no joke)

With numerous coupons in hand, a massive to-do list in my planner and my trusty Cricut by my side I knew I was all set so here is what I did and how I did it.  Unfortunately, I don’t have too many pictures of the steps I did but I do have a few and tons of great final outcome photos to show you

Here are a few of my initial cricut cut-outs.  I used the Walk in my Garden cartridge for the ladybugs and the Accent Essentials cartridge for the scalloped circles as well as the regular circles.

I used piles and piles of streamers/crepe paper since they are both colorful and cheap.  Streamers were looped over a piece of floral wire and stapled to create the two backdrops for the beverage and sweet buffets.  I used a ton of streamers for the flowers in the centerpiece.  They were hot glued to floral stakes and I would be lying if I told you they were easy.  Sure it involves just wrapping streamers around themselves you say… the amount of burns I accumulated could have sent me to the hospital.  So I will not be doing that again thats for sure! Attempt at your own risk is my recommendation.
 Close up of the flowers – everyone loved them but me 😉

Then I moved onto the labels of the beverage containers.  I created the 1 with Isabel over it in Microsoft word actually.  I was surprised at how easy it was – sometimes things like that can take longer than they need.  I then printed them out and used my EK Success paper shaper to cut them into circles.  A small piece of double sided tape and they were mounted onto the scalloped pink paper.  They were hole punched and tied with ribbon for the milk glasses aka Starbuck’s frappacino glasses (thanks to Amy who saved hers for me)  For the juice boxes and bottled water I used a green band of paper to cover the labels and then again double sided tape to put it all together.

Water bottle labels
Closer shot of the beverage buffet

When guests first entered the door they saw this great wreath (pictured below). You may have seen these wreaths before since they are ALL over Pinterest these days.  I took a 6 foot pipe insulator I got for $0.99 at Home Depot.  Then I shaped it into a circle to make the size circle I wanted, duct taped the ends together and began wrapping the yarn around it.  The wooden “I” was found unfinished at Michaels and I just spray painted that real quick and hot glued it on.  For the flowers I traced a cereal bowl on various colors of felt, cut out the circle and then cut the circle into a spiral.  I then rolled that spiral into a flower and hot glued the ends and then hot glued them onto the wreath.

Now onto the guest book.  Anyone that knows me knows I love a good guest book.  I even had one at the hospital when Isabel was born! Of course Isabel had to have one for her very big milestone of her 1st birthday.  Using markers,  colored pencils and crayons I had in my stash I put them in my favorite galvanized pails.  I cut 4×6″ index cards in half and used my We R Memory Keepers Crop-A-Dile Corner Chomper (love this thing!) to round all the edges.  Also pictured is my Fuji instax camera that guests could snap a photo of the action or of themselves and include in the guest book.

When guests were finished they could drop them in the Apothecary Jar to the right
If you have been searching for party ideas recently you know buffets are all the rage, whether dessert, food or beverage.  Take a look at the shots of the buffets I put together for Isabel’s big day…
Beverage Buffet featuring pink lemonade, iced tea, juice boxes and bottled water
Here are shots of the food buffet.  Snacks included popcorn, fruit salad, apples, yogurt, cake balls, crackers with basil and olives to look like ladybugs and last but not least baby bel cheeses that look like ladybugs.  I used cake decoration gel to put the spots on…

Who doesn’t love these?

Next up the “Sweet Shoppe”  Here we had merengues, white chocolate raspberry whoopie pies (which are too die for) sugar cookies and chocolate dipped oreos.  Then Not Your Everyday Cake made us this phenomenal cake for the centerpiece.  Also not pictured is a ladybug smash cake that looks just like the ladybug topper on this cake below.  It was a big hit and tasted yummy – Thanks Cindy and Melissa!

You may have noticed that above the beverage and sweet buffet were banners.  I made those using 12×12″ scrapbook paper I found at Hobby Lobby.  I printed the letters from Microsoft Word and actually used Becky Higgins free font download of her handwriting.  Then again double sided tape to stick them together, hole punched and fed a ribbon through.  I did the same for all banners you see.

 Close up of the Happy Birthday Banner

For her year in photos banner again used the same scrapbook paper, the same Corner Chomper and used left over cricut ladybug cut outs and a mini clothespins (found at Michaels) to label the month that they were from.

Sweet Shoppe Banner

The tablecloths were made by hand using green and pink polka dot fabric found at Jo-ann’s and the pink gingham was found at Hobby Lobby.  The moss balls that you see, white candle holders, glass cylinders, platters, cupcake tower were all part of my party stash.  I did purchase the beverage dispensers for about $25 each from Garden Ridge Pottery.

Some creative ways I chose to display the food was hollowing out the watermelon to use as a bowl.  Using ice cream cones to hold the fruit salad.  I used cupcake liners to hold popcorn.  Baby food jars placed over a tray with ice held the yogurt and the plain cake balls were put in mini flower cupcake wrappers found at Jo-Ann’s and placed on the cupcake stand.

I think that covers just about everything – I wish I had some more close-ups of the detailed aspects I talked about above but you live you learn… next time!  Thanks to everyone who helped make Isabel’s first birthday truly memorable!

I would love to answer questions about this party planning process so feel free to ask away!  Make sure you like us on facebook too.

Happy Crafting!
Rene